So, you've just discovered that 60-degree angles are not only crucial in geometry class but also in your woodworking projects. You're eager to tackle this angle with your table saw, but the thought of setting it up seems as daunting as trying to fold a fitted sheet. Fear not, because getting those perfect 60-degree cuts on a table saw doesn't have to be a head-scratching puzzle. With the right guidance, a few handy tools, and a sprinkle of finesse, you'll be on your way to nailing those angles in no time. Stick around to uncover the secrets to mastering 60-degree cuts on your trusty table saw.
Are you ready to dive into the world of 60-degree cuts? Let's get started!
- Prepare Your Workspace:
- Clear your work area of any clutter or debris to ensure a safe and spacious environment for your woodworking project.
- Double-check that your table saw is on a stable surface and the blade is in good condition.
- Set the Angle:
- Measure twice, cut once! Use a protractor or a specialized angle measuring tool to set your table saw blade to a precise 60-degree angle. Remember, accuracy is key!
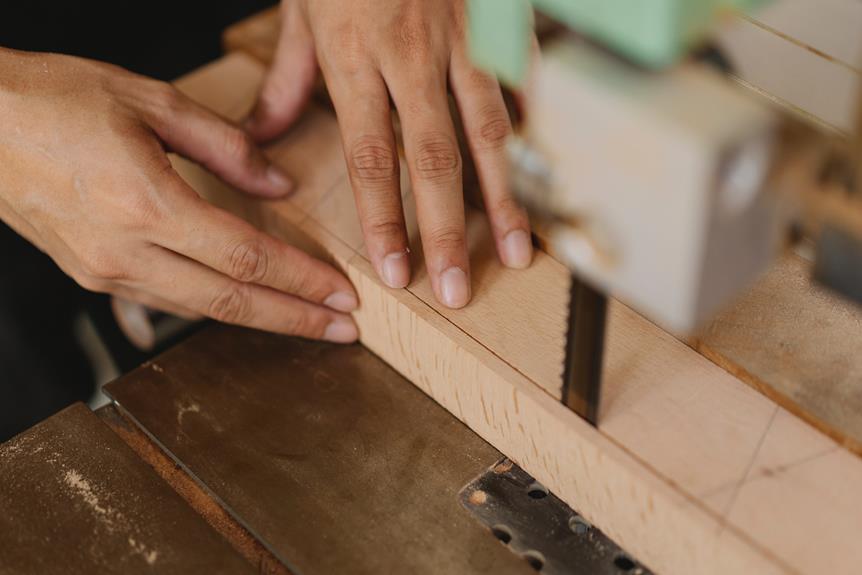
- Secure the Workpiece:
- Use clamps or other appropriate methods to secure your workpiece firmly in place. This will prevent any unexpected movement during the cutting process.
- Safety First:
- Put on your safety goggles and hearing protection. It's better to be safe than sorry, especially when working with power tools.
- Make the Cut:
- Slowly guide your workpiece through the blade, keeping steady pressure and a firm grip to ensure a clean and accurate cut.
- Test and Adjust:
- After making your first cut, check the angle to ensure it's a perfect 60 degrees. If adjustments are needed, make them before proceeding with the rest of your cuts.
- Practice Makes Perfect:
- Don't be discouraged if your first few attempts aren't flawless. Like any skill, mastering the art of 60-degree cuts takes practice and patience.
Congratulations! You've unlocked the secrets to mastering 60-degree cuts on your table saw. Now go forth and conquer those woodworking projects with confidence! �️
Necessary Tools for the Task
To tackle the task of cutting 60-degree angles on a table saw, you'll need a reliable table saw, a miter gauge or sled, a push stick, safety goggles and hearing protection, and clamps for stability and safety.
Let's start with the star of the show, the table saw. Ensure it's in top-notch condition, the blade is sharp, and the bevel angle is set at 30 degrees.
Next, grab that miter gauge or sled to guide your workpiece through the cut with precision. Don't forget your trusty push stick to keep your hands a safe distance from the sharp blade.
Oh, and the safety goggles and hearing protection? Non-negotiable! Protect those precious peepers and ears.
Last but not least, clamp down your workpiece securely. You don't want any unexpected movements during the cut.
Now that you've got your toolbox ready, it's time to dive into the world of woodworking and make those flawless 60-degree angle cuts. Remember, safety first, and let's get those angles just right!
Required Equipment List
Before you dive into the world of woodworking and make those flawless 60-degree angle cuts, it's essential to gather the required equipment. First and foremost, you'll need a reliable table saw to make those precise cuts. A protractor or angle measuring tool is your best friend for ensuring that your angles are spot on. Don't forget your push stick to keep those fingers safe and your safety goggles to protect those precious peepers. Clamps are also crucial for securing your workpiece and preventing any unexpected movements.
When it comes to shop safety, having the right equipment is as important as mastering the technique. Professional woodworkers know that the right tools can make all the difference. A miter saw can also be handy for cutting angles, but the table saw is the real star for those 60-degree cuts. Make sure your saw blade is sharp and suitable for bevel cuts to achieve clean and precise results.
Miter Gauge and Fence
Make sure to position your miter gauge at the precise 60-degree angle for your upcoming cut. As you prepare to make those sleek 60-degree angle cuts on your table saw, the miter gauge and fence are your trusty sidekicks. Here's how to make the most of them:
- Slide the miter gauge into the slot on your table saw and set it to that perfect 60-degree angle.
- Secure your workpiece against the miter gauge using a sturdy fence for stability and accuracy.
- Ensure the fence is parallel to the saw blades, maintaining precision in every cut.
- Embrace shop safety by always using a push stick or block to keep your hands at a safe distance from the sharp blades.
- As professional woodworkers and woodworking enthusiasts, take pride in your craft and wield that miter gauge and fence with confidence.
With the miter gauge and fence in place, you're ready to tackle those 60-degree angles like a boss. Just remember, shop safety is paramount, and precision is key.
Now, let those woodworking dreams unfold!
Aligning the Miter Gauge Correctly
Now that you've got your miter gauge and fence in place for those 60-degree angle cuts, it's time to ensure the miter gauge is aligned correctly for precise and accurate cuts. Here's how to do it:
- Position the miter gauge firmly against the table saw's miter slot for a snug fit. Think of it like giving your miter gauge a good, comforting hug.
- Ensure the miter gauge's protractor is set precisely to 60 degrees for accurate angle cuts. It's like setting the stage for a perfectly angled performance.
- Double-check the alignment by making a test cut on scrap wood before cutting the actual workpiece. Consider it a warm-up before the main event.
- Secure the workpiece against the miter gauge with clamps or a hold-down device to prevent movement during cutting. You wouldn't want your workpiece to pull a disappearing act mid-cut.
- Use a push stick or push block to guide the workpiece through the blade, maintaining safety and precision. It's like having your own entourage to ensure a smooth and successful performance.
Angle Measurement Precision Techniques
Ensure your angle measurements are as precise as a master tailor's cuts, to guarantee accurate and flawless results on your table saw. Professional woodworkers understand the importance of angle measurement precision techniques when working with wood. To help you achieve the perfect 60-degree angles, consider the following table for practical guidance:
| Technique | Description |
|---|---|
| Use a Digital Angle | Invest in a digital angle finder for precise measurements, ensuring your angles are spot on. |
| Miter Gauge Setup | Calibrate your miter gauge meticulously to avoid any discrepancies when cutting precise angles. |
| Safety First | Prioritize shop safety by using push sticks, wearing protective gear, and maintaining focus. |
| Seek Community Input | Engage with the woodworking community to learn from experienced woodworkers' angle-cutting tips. |
Precision in angle measurement techniques is the key to achieving perfect 60-degree bevel cuts. Embrace these tips, and soon your woodworking projects will be a cut above the rest.
Conclusion
Ready to become a pro at cutting 60-degree angles on a table saw? As an all-round home builder, I've got you covered with the know-how to tackle this task like a pro. Here's how you can do it:
- Gather Your Tools and Equipment:
- You'll need a quality table saw, a sturdy workpiece clamp, and a reliable protractor or angle measuring tool.
- Don't forget your safety gear: goggles, ear protection, and a dust mask to keep you safe and comfortable.
- Set Up Your Work Area:
- Clear your workspace and ensure good lighting for visibility.
- Double-check that your table saw is on a stable surface and the blade is properly aligned.
- Measure and Mark Your Workpiece:
- Use your protractor to accurately measure and mark the 60-degree angle on your workpiece.
- Take your time with this step to ensure precision in your cuts.
- Secure Your Workpiece:
- Use a sturdy clamp to secure your workpiece to the table saw fence. This will prevent any movement during the cutting process.
- Make Your Cuts:
- Turn on your table saw and carefully guide your workpiece through the blade, following the marked 60-degree angle.
- Keep a steady hand and let the saw do the work – don't force the cut.
- Double-Check Your Measurements:
- Once you've made your cuts, use your protractor to double-check the angles for accuracy.
- Practice Makes Perfect:
- Like with any skill, practice is key. The more you work with your table saw and practice cutting angles, the more confident and skilled you'll become.
Remember, safety always comes first when using power tools. Keep a clear mind, stay focused, and follow proper safety protocols. With these steps and a bit of practice, you'll be cutting those perfect 60-degree angles in no time!
Happy building!